
Here in the Netherlands we have a saying: wat goed is komt snel, roughly translated it means:
“if it’s any good , It’ll come fast”
And so it is with project #2.
I looked at a Picture of the original bike and sort of had an immediate vision of how it should be.
I always loved the look of the bike below the bottom of the tank line.
The exhaust in my opinion is one of nicest designs ever made.
So what I decided to do is modify the bike but leave the lower part as it was.
See my gallery for the pics.
Rolling the tubing for the right arc and finding the right tank were the biggest challenges.
The Silver and Black scheme was in my head from the beginning.
The Aprillia was assembled in Italy and the quality from a lot of parts and paint were poor, so where I could, I replaced them with better items like the crappy electric connectors are now Superseal items.
All the black on the bike is powder coat and the battery is now Lithium ion .
Front flashers are home made and the rear ones are modified Kellermans.
Alle the subframe tubing is crmo and all the turned parts are powder coated aluminium.
Electrics have been modified but all the original features have remained.
I personally am very happy with the result.
And so build#2 becomes the first one finished.
012 Wat goed is……..
Motorcycles Posted on Tue, June 14, 2016 14:57:48- Comments(0) https://blog.virtute-singulare.nl/?p=11
- Share
011 Sidestep
Motorcycles Posted on Tue, June 14, 2016 14:36:36 Sometimes when you have too many questions, you have to step back and do something else.
And so I started Build #2.
I am a sucker for design, and one of my favorites is Starck.
It was through his design of an orange juicer: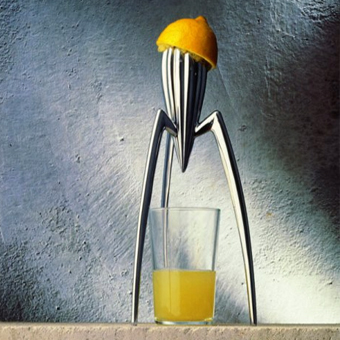 that I really got interested in his work.
So I was overjoyed when I heard he had designed a motorcycle.
i even went to the the reveal of the bike in the Netherlands in the 90’s.
The bike I saw gave me mixed emotions……….single cilinder low on power, bulky tank and a lot of plastic(his trademark then).
Price was high, so I never gave it a second thought.
- Comments(0) https://blog.virtute-singulare.nl/?p=10
- Share
010 Color choices Engine
Motorcycles Posted on Mon, February 29, 2016 17:23:19 So now with the cilinderhead taken apart, I came across an Ebay auction with a valve lifter cover for an XS650 engine. I haven’t decided to go for kick or electric start but a cover like this is rare, so I bought it.
This of course meant I had to source a rocker arm for a lifter.
I found one , but 80 bucks for a rocker is ridiculous, so I decided to fabricate my own.
Then I had to decide what color to make the cilinders, block/sump, cam covers and side covers.
I decided for an unconventional approach and so the head would be black, the cilinders silver, the block Black, the cam covers Titanium, and the side covers Titanium, the plate with the Yamaha lettering from the side cover Black.
Further decisions: Hydraulic clutch, other gear for lower rpm., PMA system, oil cooler like HHB, in Black, oil filter mod.(Heyden).
A lot of work, and as I am trying to keep costs down, I’m watching market sites for the best deal.
If you want things done in a hurry, it will cost ya!
Time to focus on the frame and all the parts that go with it!
- Comments(0) https://blog.virtute-singulare.nl/?p=9
- Share
009 Taking the engine apart
Motorcycles Posted on Mon, February 22, 2016 20:30:23 I wasn’t taking any chances, with all that metal debris I had to take the engine apart.
So first I had to build a stand to put the engine on, so that taking the engine apart would be much easier.
I started by dismantling the cilinder head.
While I was doing this all sorts of questions entered my head:
1/ Should I retain the starter motor or make it a kickstart only?
2/ Should I fit a valve lifter?
3/ should I modify the engine? a/ Rephase ?
b/ Bigger bore?
c/ Alter the final drive gear?
d/ Larger valves?
e/ Other carbs?
f/ Fit an Hydraulic clutch?
I decided to make my judgement based upon the condition the engine was in once it was dismantled.
Another question was: What color scheme should I rebuild the engine?
Man……so many questions……what was I getting myself into?
It had to feel good when ready, so I was not to take my decisions lightly.
When I lifted the cilinderhead, I had my first pleasant surprise: the pistons, valves and cilinders looked beautiful , no signs of wear or bad combustion.
I dismantled the cam cover completely by removing the rocker shafts.
Bead blasted it and had to make my first final decision : the cilinder head would become
BLACK !
- Comments(0) https://blog.virtute-singulare.nl/?p=8
- Share
008 The Engine…surprise!
Motorcycles Posted on Sun, February 07, 2016 16:56:35 When I bought the bike, it ran, but it didn’t run as good as one would expect from an engine that’s only done 20K.
These engines are known for their ridiculous reliability so I was not afraid that it would be something serious.
First up were the carburators.
I took al the hardware of, blasted it and powder coated it .
I decided to take 1 carb apart at the time.
The first carb was taken apart without any problem and I put al the parts in my ultrasonic cleaner. They came out great and so I went on to dismantle the other carb. where a nasty surprise was awaiting me. All went well until I wanted to take out the idle mixture screw.
I saw that the cap had already been taken off and the slot for the screwdriver had been badly damaged. So all my efforts to take out the screw were in vain.
Soaking it in penetrating oil for a couple of days was no improvement.
I then made the decision to drill small hole in it and use a lefthand thread device.
Drilling the hole worked out fine but when I tried to turn out the screw I heard a snapping sound and I wound up with a section broken out of the threaded part of the carb…..DAMN !
I also saw that there was no rubber seal around the remains of the screw so I had probably found the reason why the engine wasn’t running as it should.
The carb was now useless so I had to find another one.
Despite the wonders of sites as Ebay, it still took me a month to find one at a reasonable price.
then a week for it to arrive from Germany.
After cleaning and assembly of the carbs. I finally had the job done in only 6 weeks!
In the meantime I had made an engine stand for mounting the engine when taking it apart.
With the engine on the stand, I removed the oil plug and drained the engine of it’s oil.
Next up was removing the oil filters.
I took out the filter, and saw that the mesh was torn and filled with tiny metal parts.
What was I up for next ?
- Comments(0) https://blog.virtute-singulare.nl/?p=7
- Share
007 Up Next : The Frame
Motorcycles Posted on Fri, January 29, 2016 22:15:37 Having restored a number of classic bikes back to original I was really drawn to the concept of altering the Original frame. I was playing with the idea of using a Yamaha radian swing arm.
Mule had done a completely new frame, but despite its beautifull lightweight look, there still was something missing.
It was upon seeing this bike when I realized that this was the rear wheel setup I was looking for.
I was really disappointed by the build quality from these Yamaha’s.
The frame welds were ugly and lots of parts lacked quality in the sense of being durable.
The alloy tank and seat I had already bought from red max speed shop in England, so the time of fitting, and measuring began.
I decided to source a shock for the rear which became an example from a Honda Hornet. (like the front fork)
While measuring I found that the seat frame had to be raised 50mm.
So the original frame was cut and altered in a way no other builder has yet attempted.
I need to be original.
- Comments(0) https://blog.virtute-singulare.nl/?p=6
- Share
006 Stripping down
Motorcycles Posted on Sat, January 23, 2016 19:42:56 So with all the stuff coming in I decided to put the 650 on the lift and start stripping it down.
Whilst doing so I kept on thinking of how I would alter it to give it my signature.
This resulted in hours of string at the bike, taking pictures with my phone and then sit back behind my Laptop and look at other bikes.
So I decided on a usd front fork, and found one from a Honda 650 Hornet.
I had to ditch those dreadful alloys and found a Suzuki Gs 550 twin disk front wheel hub.
I refurbished the hub, and powder coated it in blue.
This was the first time I powder coated and it was quite disastrous.
Putting on the powder was no problem, but when baking it, it started developing craters and tiny lumps.
I was absolutely sure that I had thoroughly cleaned it!
Anyway when you have a piece like an old alloy hub it wil have become poreus over the years.
In the metal gases and debris have build up an when you bake it , they come out…under the powder coat and ruin your results.
So you have to degas it first which means putting it in an oven at 180 degrees Centigrade, the clean it again, then powder coat.
So to repeat this proces I had to remove the old powder coat which also was a trip!
Powder coat is extremely hard to remove, but I found a solution in a paint stripper spray, that after put on I put the whole covered hub in a plastic bag for a couple of hours, and then remove the stripper with the powder coat from the hub…….it took days!
So I was overjoyed when I finally got the hub done.
I sourced a black rim and stainless spokes with blue anodized nipples.
I refurbished the discs and put the whole front end together.
I loved the way it looked……….I was onto something good!
- Comments(0) https://blog.virtute-singulare.nl/?p=5
- Share
005 Starting Project #1
Motorcycles Posted on Thu, January 14, 2016 20:39:56 So With all the previous in mind I set off, to find myself a Yamaha XS 650 for my first Project.
My goal was to get get one cheap and so I found myself almost buying a project bike which was already disassembled, but complete…………not , a lot of parts I wasn’t going to use were missing, but also the license plate was gone.
Reason for me not to to buy the bike, but as I was ready to leave the seller told me he had a complete bike inside.
It was a XS 650 heritage special, in my Eyes the least attractive one built, but we agreed on the price and best thing was that the bike only had done 20.000 KM.!
So, now I had a bike ……what next?
This is where the internet comes in and searching the net proved to be a true treasure chest filled with info, tips, tricks , parts and of course Movies.
Most inspiring for me were the clips put up by Chris Chappell from the company with the same name.
Chris did a fabulous job on filming himself building his Board tracker “stout33” .
I absolutely loathed the music in the videos, but I loved his approach in taking on the work.
And building things, like a vacuum forming machine by himself.
If I wanted to build bikes this way, it meant that I had to buy a LOT of equipment!
And what’s even more important : a place to put it all!
I found a place to my liking and started searching for used machines.
I already had a compressor, Mig welder, power tools and hand tools.
So I went looking for a Lathe, mill, Tig welder, motorcycle lift, workbenches, pipe bender and so on.
I soon found out that a lot stuff could be bought new for a price, so low that I wasn’t even considdering second hand.
However some things are expensive so I opted for 2 things:
Buying it for cash or building it myself.
Because building takes time I bought most of the things, but I decided to build a powder coating oven myself. This is because I could not find one in the size I wanted it.
- Comments(0) https://blog.virtute-singulare.nl/?p=4
- Share
